
Do your palms start to sweat at the thought of trimming your own dog’s nails? If so, you’re not alone. So many of us get nervous at the thought of cutting a nail too short or cutting it wrong, and hurting our dog. That’s why we happily pay professional groomers or vets to do nail trims for us.
However, nail trims don’t have to be this stressful. With the right tools and guidance, it’s actually a simple, safe, and inexpensive process. Read on to learn how to make trimming your dog’s nails at home a positive experience for both you and your pup.
Introduction to Dog Nail Trimming
Whether done at home or by a professional, nail trimming is a necessary part of caring for your dog. Everyone should have a good grasp on nail-trim basics. Understanding the anatomy of a dog's nail will help you trim it in a way that avoids injuring your dog. Being aware of common issues like ingrown nails, split nails, and nail disease is also important to your dog’s health.
Benefits of Trimming Your Dog's Nails
Keeping your dog’s nails trimmed to a healthy length protects them from snagging on carpets, furniture, and other surfaces—this allows your dog to move about without pain or discomfort from their nails. It can also help to prevent painful splitting, cracking, infection in the nailbed, and ingrown nails.
Keeping your dog’s feet healthy is incredibly important. If they can’t move comfortably because of an issue with their paws or nails, then their quality of life suffers. To avoid this as much as possible, you need to keep their nails at an appropriate length. For most dogs, that means trimming their nails.
Understanding Your Dog's Nail Anatomy
It’s useful to understand the anatomy of a dog’s nail before you start trimming. The nail is composed of two parts: the quick and the nail itself. The quick is a blood vessel that runs through the nail and provides nourishment. If you cut the quick, it will cause pain and bleeding. The hard part of the nail is composed of three layers: the outer layer, the middle layer, and the inner layer. The outer layer is the hardest, and this is where you want to make the cut.
The most stressful part of trimming your own dog’s nails is, almost always, trimming just enough to avoid cutting into the quick. We’ll go over how to identify the quick in a moment. Before we get there though, let’s make sure your dog is relaxed and ready for their spa date with the nail trimmer.
Preparing for Trimming Your Dog's Nails
Before you start trimming your pup’s nails, you may need to get them used to the idea. They might be nervous about having their nails cut. Maybe they’ve had a bad experience in the past or they’re just not used to having their paws handled. In either case, it’s a good idea to warm them up and slowly work up to actually cutting their nails.
Start by familiarizing your pup with the clippers. Let them sniff and investigate the tool, and give them treats for remaining calm. Try holding their paw in your hand and placing the clipper against their nails. You should also make sure to have your pup in a comfortable position. You may want to have them lay down on a blanket or a bed. And make sure you have plenty of treats on hand to reward them.
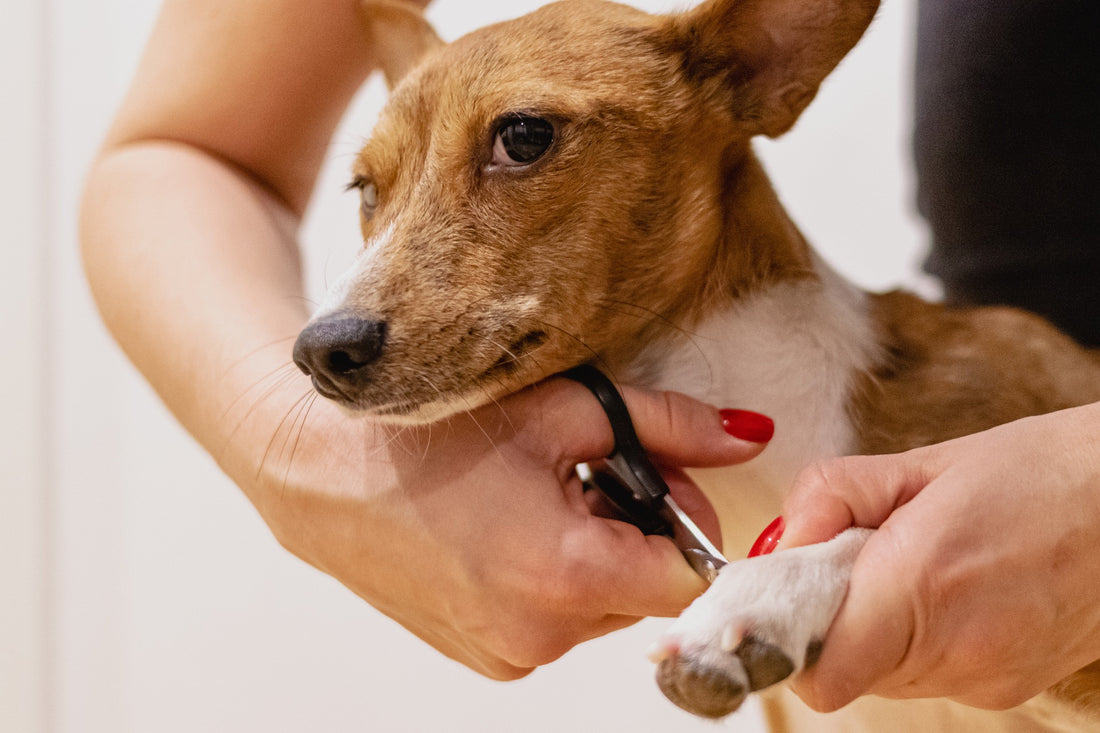
Step-by-Step Guide to Trimming Your Dog's Nails
Once you and your pup are both ready, you can start trimming. The steps are simple to follow. Just make sure to stay patient and take your time.
Start by holding your pup’s paw gently, and examine their nails. You need to locate the quick in each nail before you can cut it. If your dog has light-colored nails, you’re in luck! This part will be simple.
Finding the quick for light-colored nails
If your dog has light or translucent nails, finding the quick is relatively easy. Look for the pinkish or darker-colored triangle inside the nail when you are looking at it from the side or top. That’s the quick. See? Simple!
Finding the quick for dark-colored nails
If your dog has dark or black nails, finding the quick can be more challenging, as it is not visible from the side or top. To find the quick in dark nails, you can try looking at the underside of the nail. You may be able to see a softer, more "crumbly" part of the nail that looks different from the hard outer shell. This is likely where the quick is located. Be extra careful when cutting dark nails.
If you're still uncertain about the location of the quick, you can use the following tips to minimize the risk of cutting into it:
Shine a flashlight against the nail: Using a flashlight or another strong light source can help you locate the quick in dark-colored nails. By placing the flashlight directly against the nail, you may be able to locate the quick as a shadowy mass in its center.
Trim off small amounts at a time: When trimming your dog's nails, take only the tip off with each cut. Gradually taking off slivers is safer than taking off a large amount at once.
Look for the "pre-quick": As you trim small bits off the tip of the nail, keep an eye out for the area known as the "pre-quick." This is a small black or pink dot on the cut surface of the nail. Once you reach the pre-quick, stop trimming. If you continue to trim, you may cut into the quick.
Trimming your dog’s nails
Once you’ve found the quick, trimming their nail is easy.
Simply position your clipper near the end of the nail. You normally don’t need to trim very much (especially if you’re good at maintaining your dog’s paw health). Just make sure to avoid cutting into the quick!
Trim the nail in small increments. It is better to trim too little than too much. Plus, trimming the nail down gradually is much more comfortable for your dog than attempting to take a large chunk off all at once.
After you have trimmed the nail, there will be some jagged edges. You can use a nail file to smooth these and round them out so they would snag or cut anything.
The last step is to reward your pup with treats to ensure that the experience is good and positive for them. Rewarding your dog is a critical step for helping them feel less anxious about having their nails trimmed, so reward them often.
Repeat this process on your dog’s remaining nails, and you’re done! It’s that simple.
Trimming your dog’s dewclaws
In addition to trimming your dog’s nails, it is essential to trim their dewclaws regularly. Dewclaws are the small claws on the inside of your dog’s leg, usually above the paw. Not all dogs have dewclaws, but if your dog does, it is important to keep them trimmed to avoid injury.
Dewclaws are prone to overgrowth, which can cause them to curl and grow into the paw pad, leading to pain and infection. Dewclaws that are not trimmed can also get caught on furniture or carpeting, leading to painful injuries.
To trim your dog’s dewclaws, follow the same process as trimming their nails. Position your clipper near the end of the dewclaw, making sure to avoid the quick. Trim in small increments, filing down any jagged edges afterward.
Regular trimming of your dog’s dewclaws will help keep them healthy, comfortable, and pain-free.
Tips and Tricks for a Stress-Free Experience
Trimming your pup’s nails can be a positive experience if you use the right techniques, tools, and rewards. Here are a few tips and tricks to make the process easier:
Start slow and go slow. Take your time and let your pup get used to the process. Take breaks if your dog needs it. Especially if they are not used to the process.
Use the right tools. Invest in a quality pair of clippers or trimmers, and a good nail file.
Provide plenty of treats and rewards. Offer your pup treats and rewards throughout the process to keep them calm and focused.
Find a comfortable position. Make sure your pup is sitting or laying down in a comfortable position.
Take breaks. If your pup is getting anxious or stressed, take a break and let them relax before continuing.
Products and Tools for Dog Nail Trimming
When it comes to trimming your pup’s nails, you want to make sure you have the right tools for the job. Here are some products and tools you will need for a successful nail trim:
Clippers or trimmers: these are used to cut the nail. Make sure to get a high-quality pair that is sharp and sturdy. But most importantly, choose one that feels good in your hand and is appropriately sized for the thickness of your pet's nails.
Nail file: this is used to smooth out any rough edges after the nail is trimmed.
Treats and rewards: these are used to keep your pup calm and focused, and to reward them for good behavior.
Cotton balls and styptic powder: these are used to stop any bleeding in case you accidentally cut the quick. Have the styptic powder open and at hand before you start trimming.
Frequently Asked Questions
Q: Why is it important to trim my dog's nails?
A: Overgrown nails can cause discomfort and even pain to your dog when walking or standing, and they can also become more prone to breaking or tearing, which can lead to infection.
Q: How often should I trim my dog's nails?
A: The frequency of nail trims depends on your pet's lifestyle, breed, and the rate at which their nails grow. Generally, most pets need their nails trimmed every 3-4 weeks. Active pets that frequently walk on pavement may naturally wear their nails down and require less frequent trims.
Q: How short should I trim my dog's nails?
A: You should aim to trim your dog's nails just enough to avoid them touching the ground when your dog is standing.
Q: Can I use a nail grinder instead of clippers?
A: Yes, nail grinders are a good alternative to clippers, especially for dogs with thick nails. They work by filing down the nail instead of cutting it, which can be less stressful and more comfortable for some dogs.
Q: How do I get my dog used to having their nails trimmed?
A: Start by getting your dog comfortable with having their paws handled, touched, and massaged. Gradually introduce the nail clippers or grinder and use treats and positive reinforcement to create a positive association with the process.
Q: How can I tell if I cut the quick?
A: If you cut the quick, you will see a small amount of blood coming out of the end of the nail.
Q: What do I do if my dog's nails are bleeding?
A: Apply pressure to the bleeding nail with a clean cloth or gauze for several minutes. You can also use styptic powder or cornstarch to help stop the bleeding. With styptic powder, you’ll need to hold pressure on the nail for about 30 seconds to stop the bleeding.
Q: Can I trim my pet's nails if they are fearful or aggressive?
A: If your pet is fearful or aggressive during nail trims, it may be best to consult a professional groomer or your veterinarian. They can safely trim your pet's nails while minimizing stress and the risk of injury.
Q: How do I know if my pet's nails are too long?
A: Pet nails are too long if they touch the ground when your pet is standing, make clicking noises when walking on hard surfaces, or cause your pet discomfort or difficulty walking. Overgrown nails can lead to pain, discomfort, and potential injuries.
Q: How can I prevent my pet's nails from growing too fast?
A: While you can't prevent your pet's nails from growing, you can ensure that they're worn down naturally by taking your pet for regular walks on pavement or other abrasive surfaces. This will help maintain a healthy nail length between trims.
Wrapping Up
Trimming your pup’s nails is an important part of pet care, and it is important to understand the basics before you start. With the right tools, knowledge, and techniques, it can be a stress-free experience for both you and your pup. This guide provides a step-by-step guide to trimming your dog’s nails, as well as tips and tricks to make it a positive experience. Be sure to invest in the right tools, provide plenty of treats and rewards, and take your time. With these steps, you will be able to keep your pup’s nails healthy and trim with ease.